Ubuntu Tips and Tricks
Setting up integrated Clipboard manager similar to the functionality of Windows + v (contains all the ctrl+c)
Install using the following commands:
sudo add-apt-repository ppa:diodon-team/stable
sudo apt-get update
sudo apt-get install -y diodon
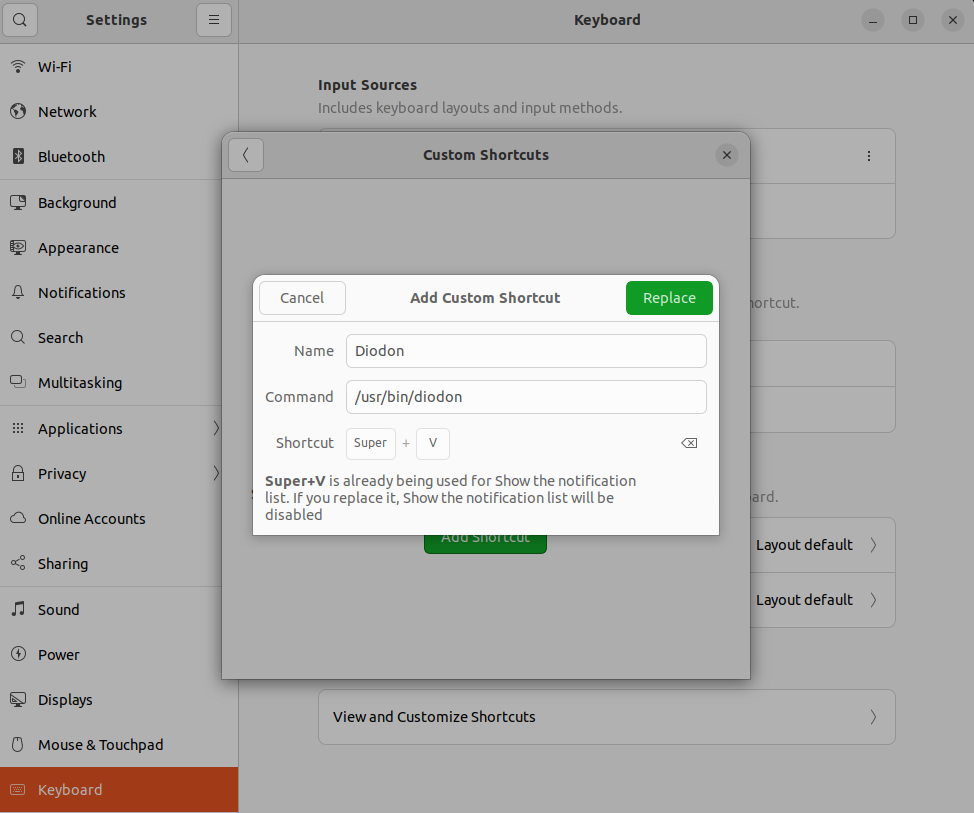
After installtion, we need to set the shortcut. For GNOME/Unity this can be done by opening Settings->keyboard. There you go to View and Customize Shortcuts -> Custom Shortcuts and add a new one with the name “Diodon” and command “/usr/bin/diodon”. Afterwards assign your preferred hotkey and you are done.

Setting up power management
Install using the following commands:
sudo add-apt-repository ppa:linrunner/tlp
sudo apt update
sudo apt install tlp tlp-rdw
sudo systemctl enable tlp.service
Setting up your favourite video player
Install using the following command:
sudo snap install vlc
Setting up your favourite code editor
Download the latest .deb file from the followiing link: https://go.microsoft.com/fwlink/?LinkID=760868
Install using the following command:
sudo apt install ./<file>.deb
Setting up your favouite browser
Download the latest .deb file from the followiing link: https://www.google.com/chrome/?platform=linux
Install using the following command:
sudo apt install ./<file>.deb
Setting up your favourite image editing software
Install using the following command:
sudo apt install gimp
Setting up your favouirte Terminal
Install using the following commands:
sudo apt-get update
sudo apt-get install terminator
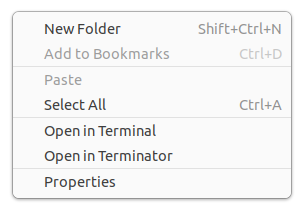
Next, we need to add the Open in Terminator to filemanager menu as shown in the following figure.

Install the following packages:
sudo apt install python3-nautilus python3-gi procps libjs-jquery
Download Actions For Nautilus from the following github:
git clone https://github.com/bassmanitram/actions-for-nautilus.git
cd actions-for-nautilus
# to install for only your use
make install
# to install for all users
sudo make install_global
nautilus -q
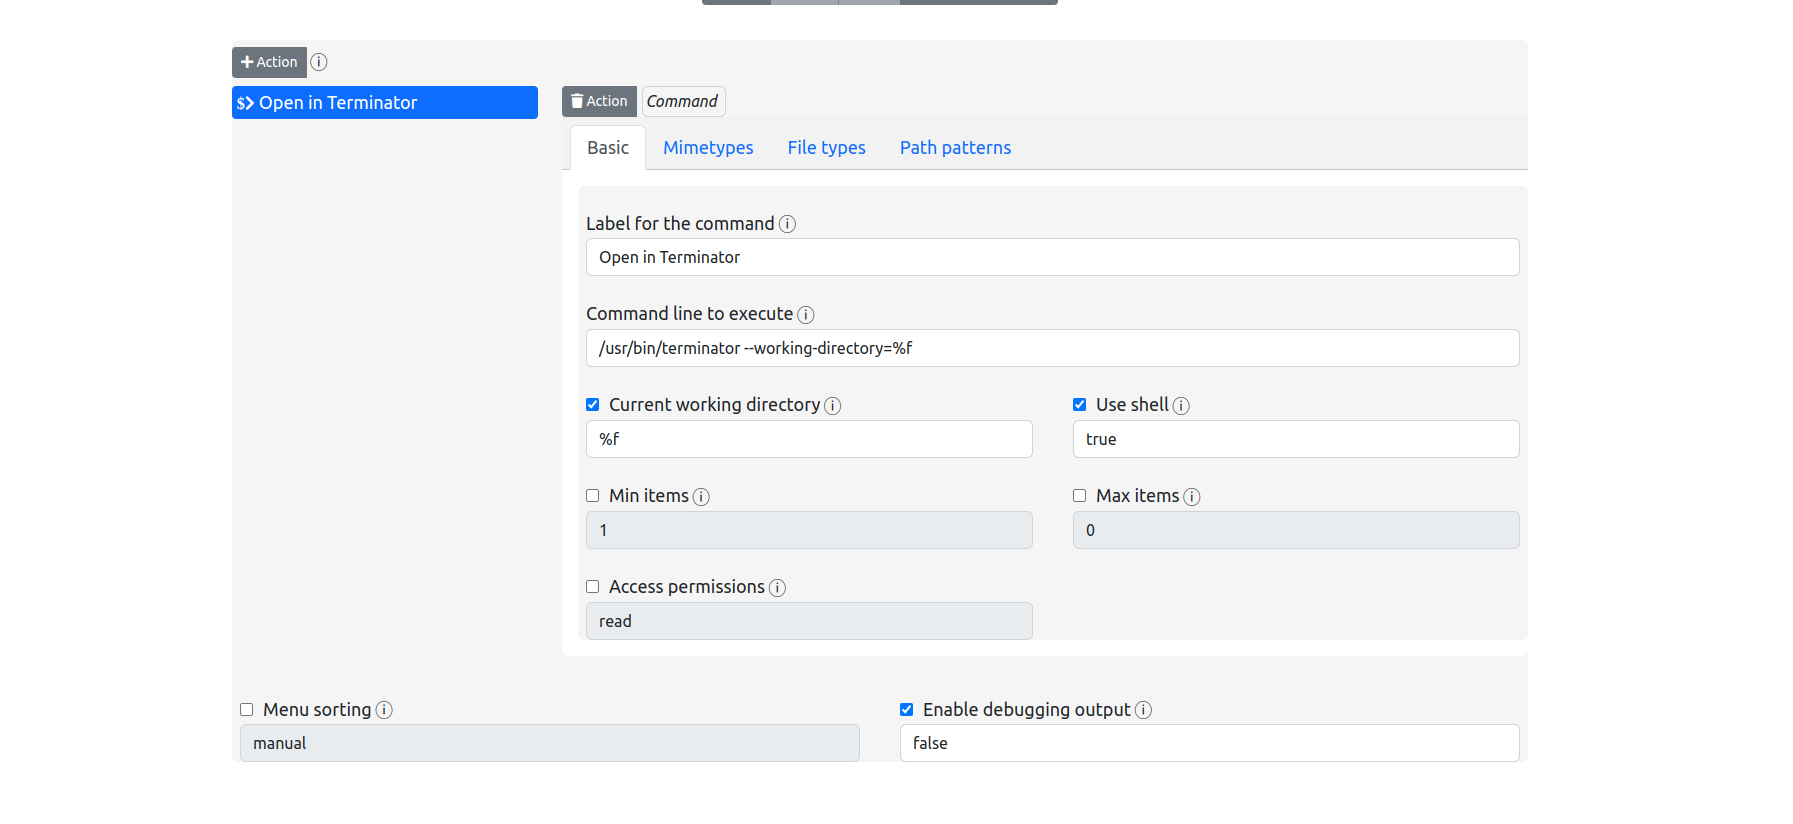
Next, open the Actions For Nautilus configuration from the menu and set the options as shown in the below image.

Enjoy Reading This Article?
Here are some more articles you might like to read next: